
Oil Lamps
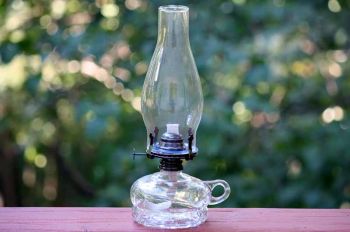
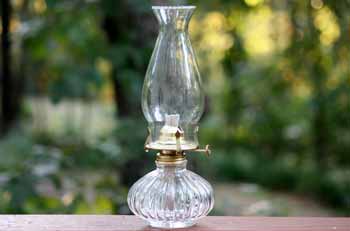
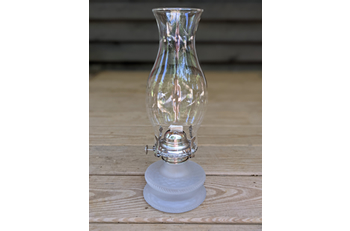
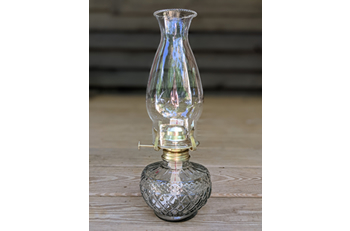
From the antique to the exquisite, enduring oil burning lamps add charm to any space in your home. Outfit walls, nightstands, fireplace mantels and bookcases with the magical ambiance of glass oil lamps. Oil burning lamps have been used for thousands of years and referenced in all major religions. Perhaps it was the oil lamps that gave humans not only light in their homes but also hope in their hearts. Great for electricity free every day lighting or to have on hand when the power goes out. We also carry an impressive variety of oil lanterns with a cold-blast design which provides brighter, cleaner light than conventional oil lamps.


Oil Lamps
- Oil Lamp Parts
- Wicks

- Lamp Globes
- Oil Lamp Burners
- Lantern Oil
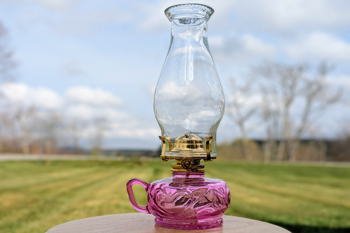
- Glass Oil Lamps

- Oil Lanterns
Once the chimney is removed, unscrew the burner in a counterclockwise motion and remove the burner and wick. Slowly pour lamp oil into the base of the lamp up to 1/2 inch from the neck. Replace the wick and burner and tighten until snug. Allow the wick to absorb the oil for at least 15 minutes before lighting. Adjust the wick evenly to the height of the wick guide tube. See our list of approved oil lamp oils here.
Keep oil lamps filled at least one inch above the bottom of the wick for optimum performance.
- First, select the type of oil you will use, (approved oil lamp oil list).
- Fill your lamp with oil (learn how).
- With the lamp filled, adjust the wick height to the top of the wick guide tube and allow the wick to absorb oil for 20 minutes.
- Light the wick and replace the chimney. You may need to light the wick at 1/4" over the wick guide to light, then turn the wick back down so it is even with the guide.
- Upon first lighting keep the flame low a few minutes and allow the lantern to warm up before doing your final flame adjustments.
- You can adjust the wick up and down, allowing more or less oil to burn, to achieve desired brightness. Then adjust the flame so no smoke or soot is produced.
Raising the wick too high will result in incomplete combustion and cause smoke, soot deposits and the expelling of particulate matter into surroundings. Lower the wick until it stops if you see smoke. You can also put the lamp out.
Extinguish the flame by slowly lowering the wick until the flame goes out. This method is easier than blowing out the flame. Or if you're feeling nostalgic, when the time comes to extinguish the flame, simply cup your hand above the chimney and give a little burst of a breath. The air will go down the chimney and extinguish it just fine.
Allow the lamp to cool completely before refilling, removing the chimney or storing.
Most odor is produced when extinguishing the flame and if this is done outside undesirable odors can be considerately reduced. Clear lamp oil create little or no odor while kerosene has a slight odor. (More information about lamp oil vs. kerosene.)
An oil lamp burns fuel to produce light with a controlled flame, seen in the illustration below. The fount or fuel tank attaches to a wick-holding lamp burner with four prongs to hold the oil lamp chimney. The fount is filled with fuel oil which is "wicked" though the burner-held cotton wick. The burner features a wick adjustment knob to optimize the oxygen/fuel ratio for complete combustion.
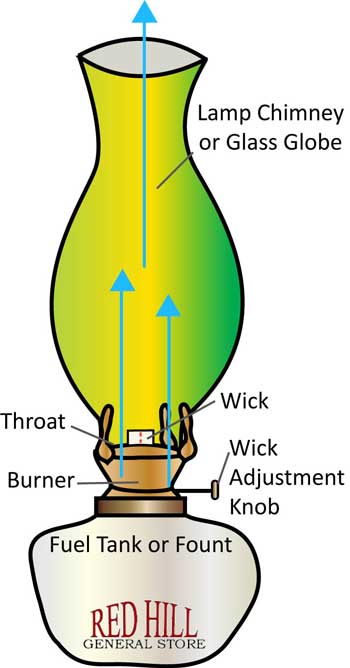
Construction of oil lamps enhances the thermal draft and prevents the flame from being blown out. Thermal draft airflow to the wick is controlled through burner vents and the open chimney. The key to effective lighting is the "throat"; the tight connection between the chimney and burner. This allows for complete combustion which carries oxygen past the flame for a steady smoke-free light that's brighter than an open flame. The throat is important to keep in mind when ordering a replacement oil lamp chimney.
A few operation tips:
- Keep burner and chimney clean and free of carbon buildup. For how to clean an oil lamp visit here.
- Never leave a burning kerosene lamp unattended or in the reach of children
- Use oil lamps on tables and flat surfaces
- Maintain a low flame height to avoid severe smoke and soot damage.
- If the wick becomes charred or burned, put out the lamp and allow it to totally cool. Trim off the damaged portion of the wick and readjust.
- Never leave a lit lamp unattended.
- For best function keep oil filled 1 inch above the bottom of the wick.
Your oil lamp won't stay lit? Here's some troubleshooting:
- Wick is too low, not getting enough oxygen to maintain the flame. Raise the wick height.
- Is your wick too big? Not getting the proper balance of fuel oil and air will not allow for proper combustion. Try adjusting the wick up or down.
- You wick isn't soaked with enough oil. When you light the wick the cotton is burning, not the fuel oil. Trim or replace damaged wick and allow to soak with oil for 20 minutes.
- Are you using the proper fuel? Refer to this list for approved fuel options for proper oil lamp lighting.
- Too much soot buildup will choke out the oxygen needed for a nice flame. Excess soot can cause the lamp or oil lantern to not stay lit. Clean soot from burner, wick and chimney.
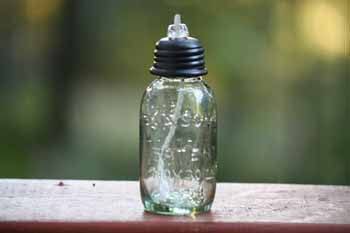
- You will need: a mason jar, metal lid, nail, bottle of olive oil or non-toxic burning oil, and one quality cotton wick.
- Puncture a hole in the lid with the nail and run the wick through the hole to the bottom of the jar. Only expose about half an inch of wick to avoid large flames.
- Pour in the oil and tighten the lid on the jar. Voila! Your very own homemade mason jar oil lamp!